PCMA-3D v2
PCMA-3D v2
If you're talking about immersive audio, you can't get around Hyunkook Lee's great work on this topic, which is a must-know.
He made some very impressive recordings with the PCMA-3D v1. Please have a look at THIS video, to learn about this setup and it's features. - Then put on your headphones and listen to THIS.
With the new version of the PCMA-3D Prof. Lee shows a setup to capture "[...] a natural and realistic representation of the sound field, ensuring accurate localization and a balanced spatial impression. This design is based on key psychoacoustic principles of vertical stereophony." (source)
But let the inventor describe his system with his own words:
"Configuration: The original PCMA was designed for effective direct-to-reverberation ratio control in the 5.1 format, utilising two coincidentally arranged directional microphones at each pick-up point of the array. This concept was later adapted for 3D recording, based on experimental findings suggesting that vertical microphone spacing or vertical decorrelation has little effect on overall spatial impression. PCMA-3D, therefore, employs a horizontally spaced, vertically coincident microphone arrangement. The vertical pair is angled so that there is at least 7-10 dB of channel separation as in ESMA-3D. A supercardioid microphone (Schoeps CCM41) facing directly upwards captures the height channel, while a cardioid microphone directed towards the source ensures optimal performance. For the ECHO project, PCMA-3D v2 was used instead, featuring omnidirectional microphones (Schoeps MK2H) for the main layer (L, C, and R) to extend low-frequency response. Additionally, the height layer was positioned approximately 25 cm above the main layer, providing sufficient channel separation through decorrelation above 1 kHz." (source)
The layout is like shown in this graph.
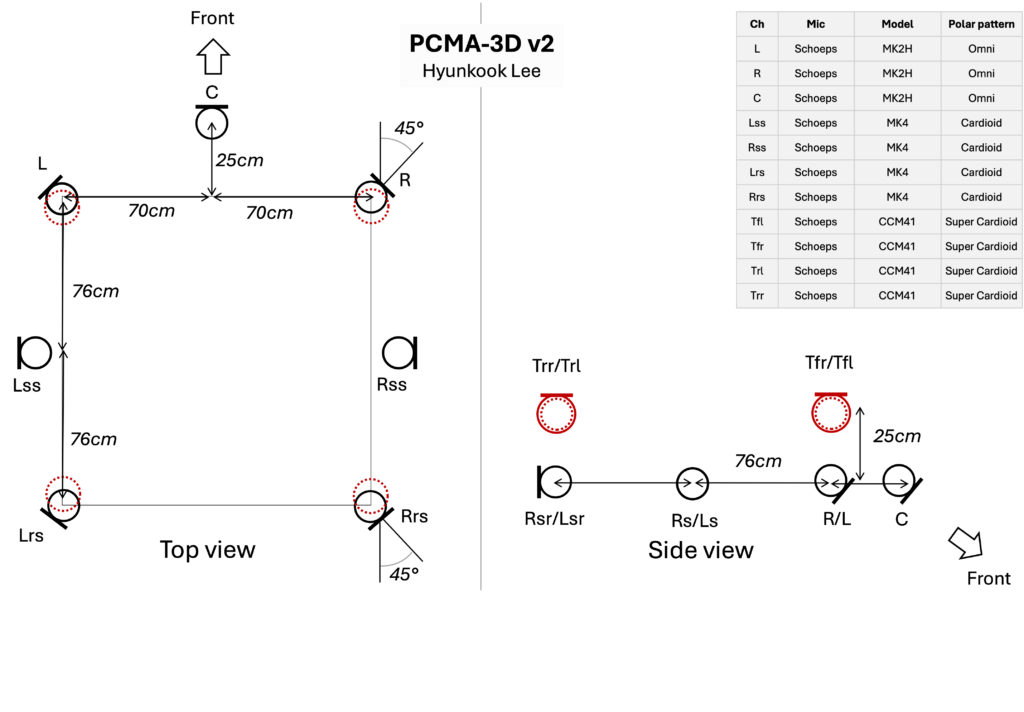 (source)
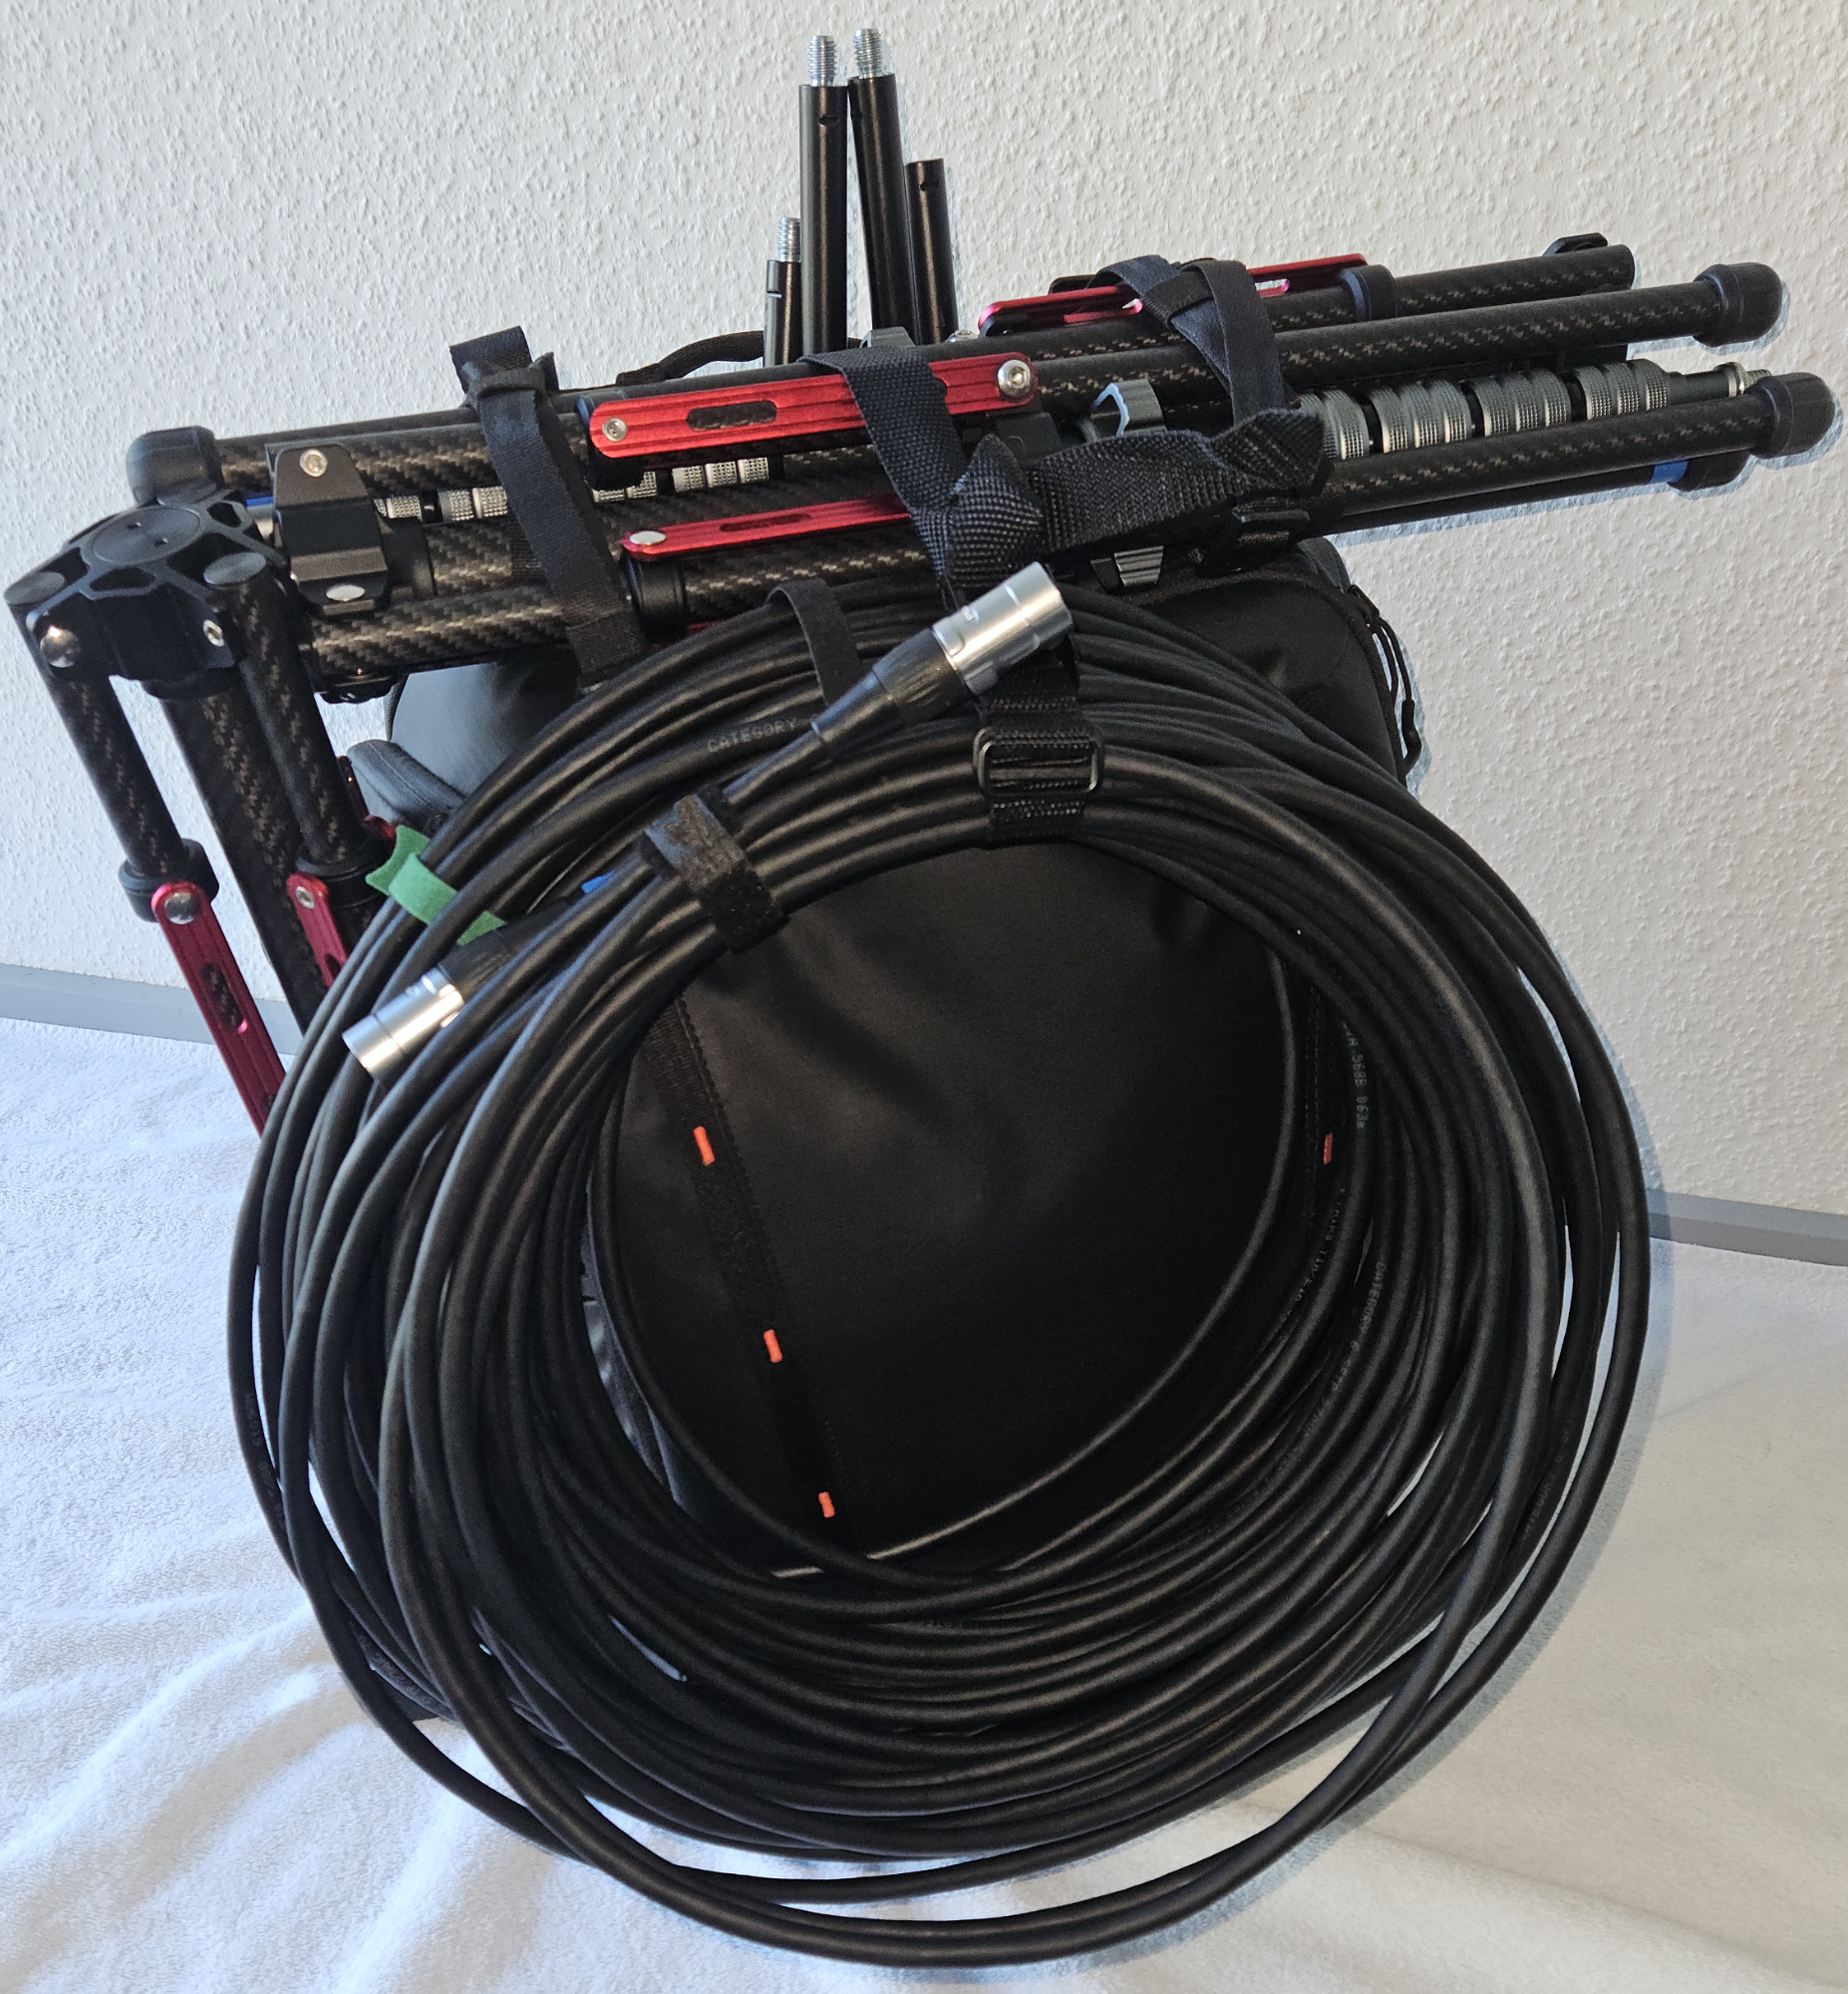
This is quite a thing! We wanted to make it light enough that you could carry it a for a few miles on your own. We built this system with our own gear, took it all down, and packed it into our bigger backpack. The total weight was 22 kg!
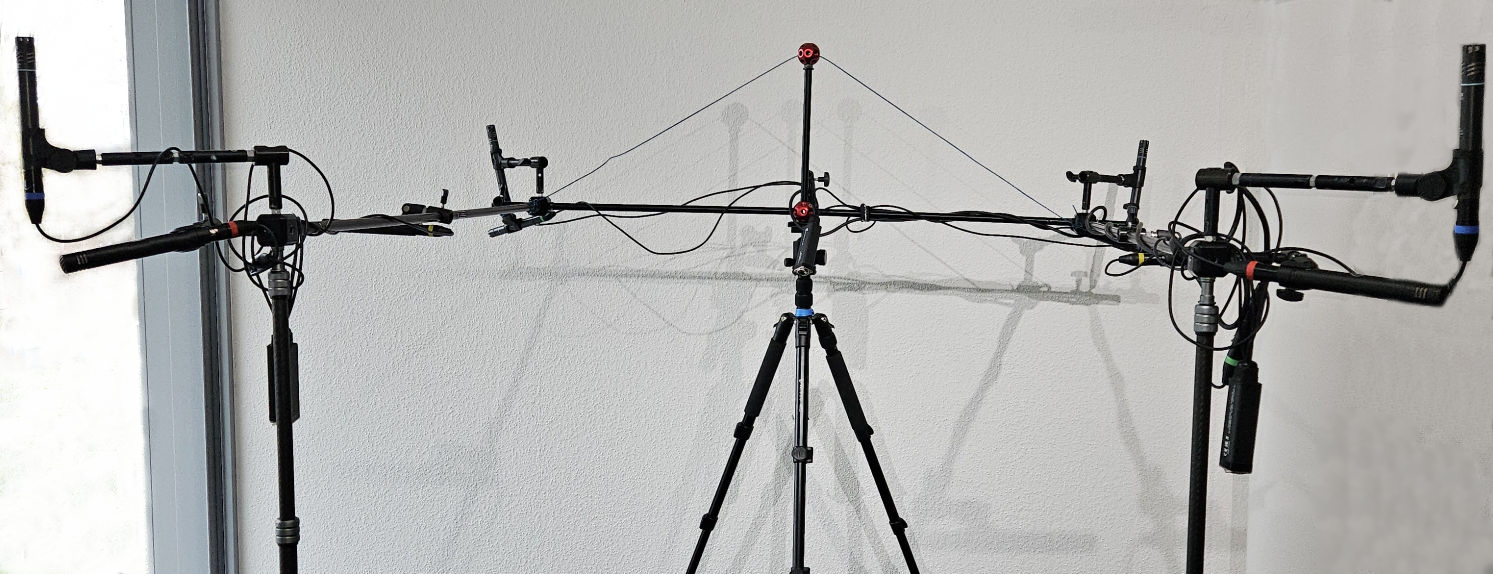
And this is what it looks like, when it's all rigged up:
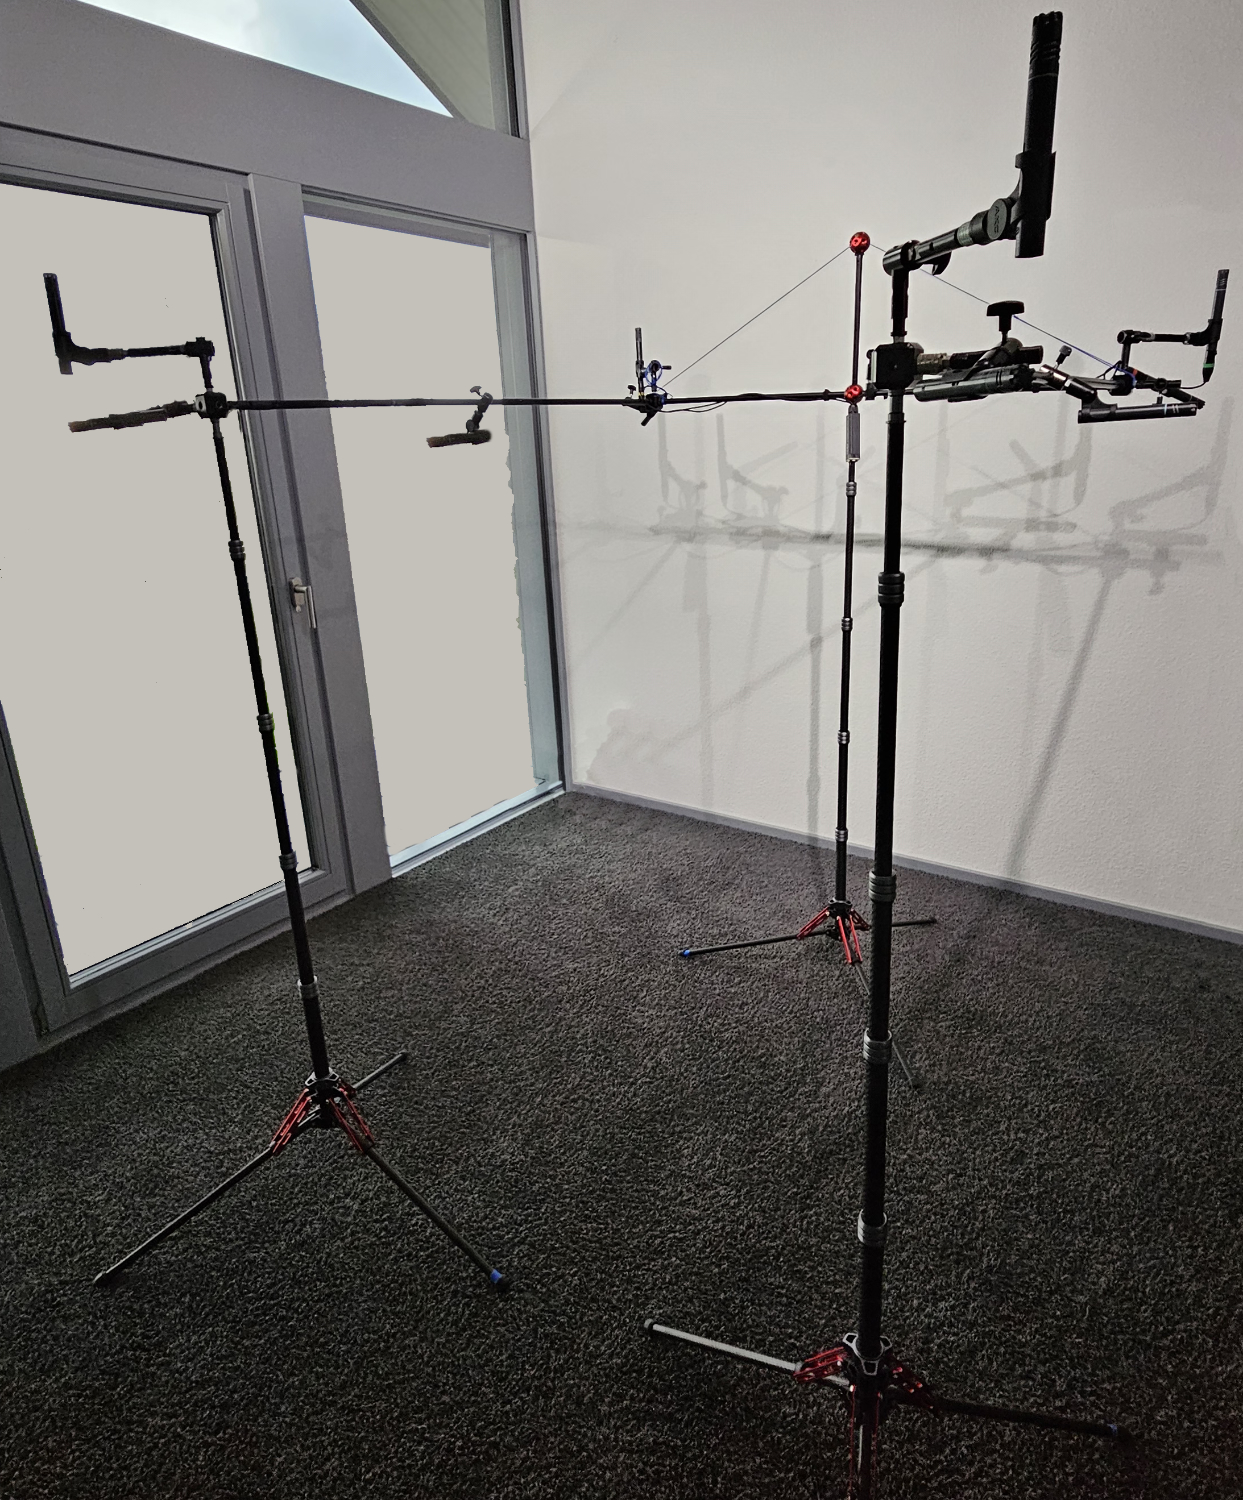
It took us a while to reduce the weight and find the optimal configuration.
The problem is the three multicore cables. They are really difficult to attach, they are heavy and make the whole thing a little unstable to carry. But it works.
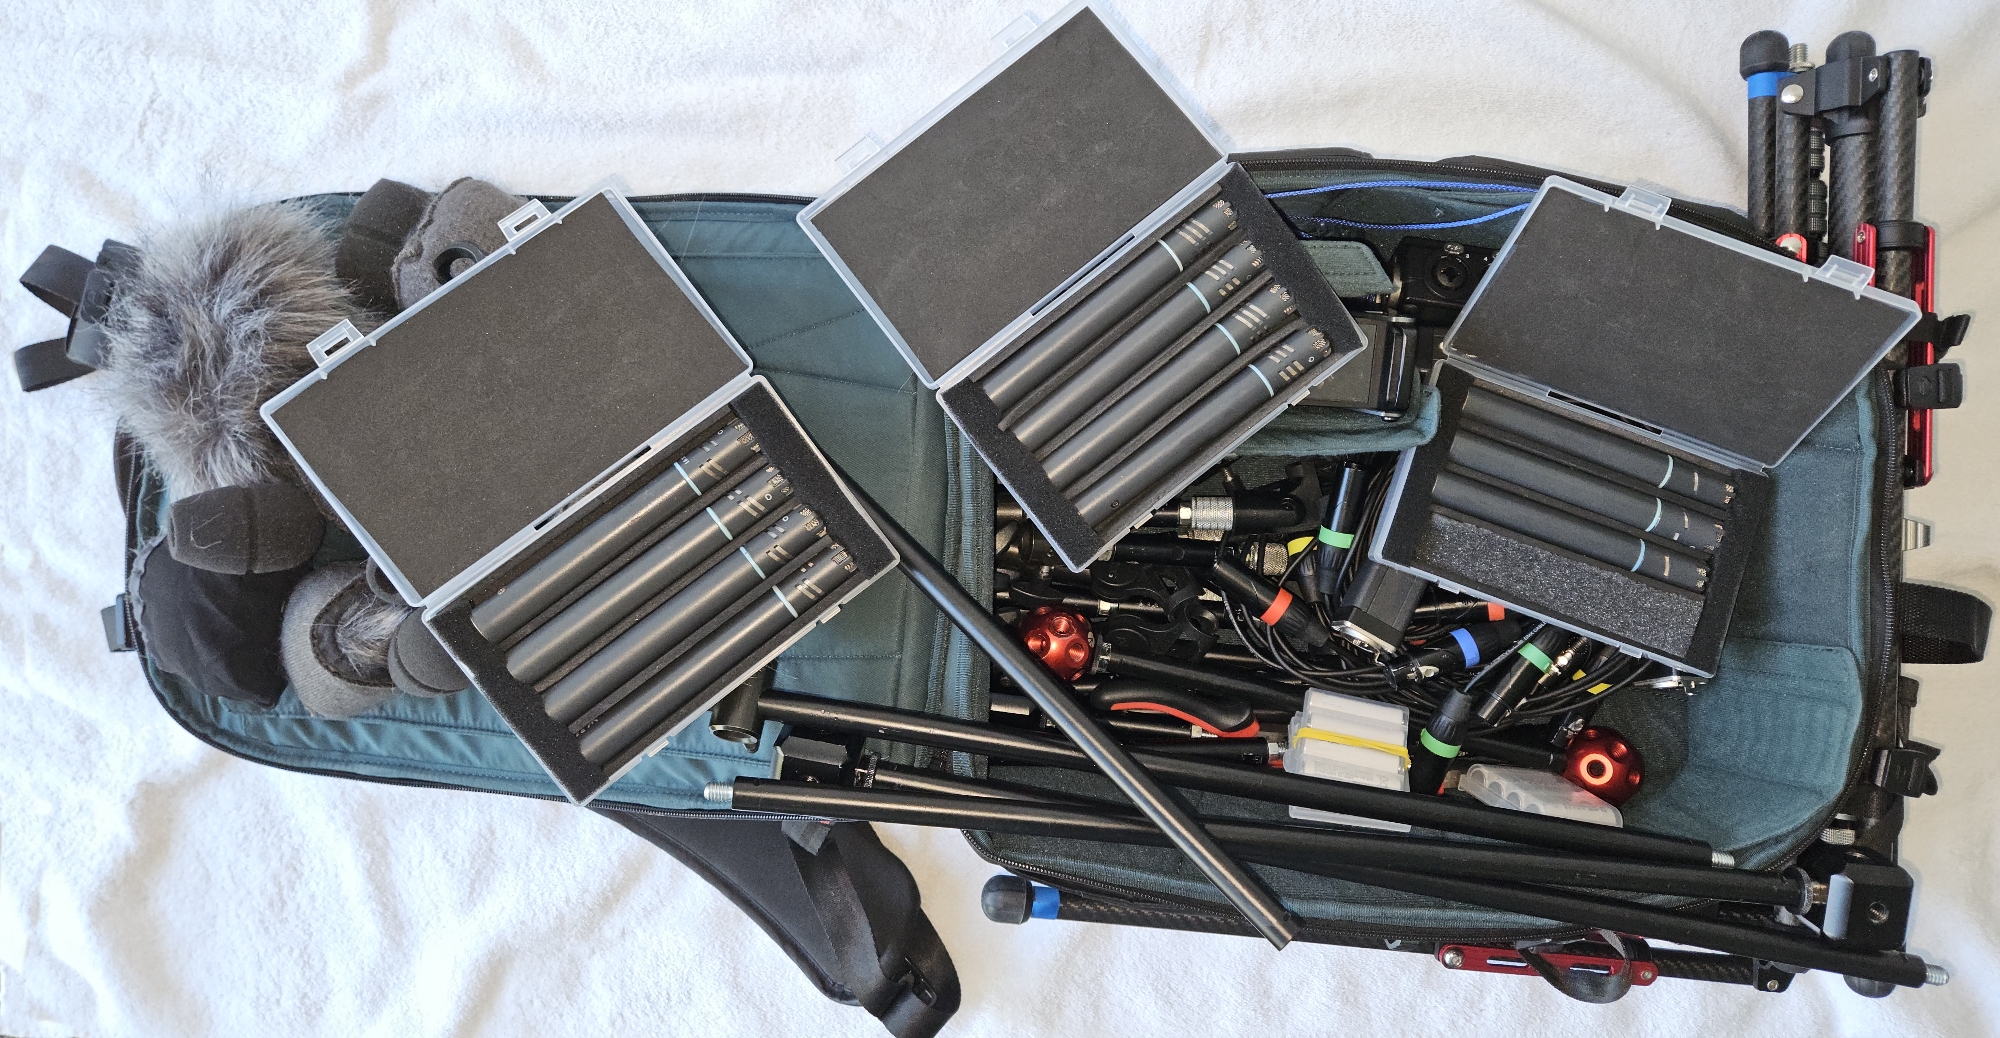
Here's a quick look inside the backpack! Just to give you an idea! We use plastic boxes to keep the microphones safe and clean.
The wind protectors are soft cushions that you can place in the small spaces to prevent the equipment from moving around.
If you are interested in setting things up yourself, please find the tutorial and the shopping-list to assist you.
This is a lot of gear, so you should practice setting up a few times before heading out to make great recordings. In the tutorial, we’ll share some tips and tricks that we’ve learned, but this list doesn't postulate to be exhaustive.
We’re always happy to receive feedback and suggestions on how to improve it.
For a better understanding of it all, we recommend the original mixing notes of Hyunkook Lee.
We discovered a very nice article about the PCMA-3D v2 and PCMA-3D v1, published on Schoeps' website. Here you'll find the information, that you may scale the size of the microphone array, according to your needs. Which is not a real surprise, but a helpful information. And if you want to listen to experts talking ... HERE you are!
You also may like to read the article "Art and Science of Immersive Recording"